

AppType : Traffic Packet Analyzer (a.k.a. Sniffer)
Homepage: http://www.wireshark.org/download.html
Portable Available: Yes
WARNING: This tool could be use for bad intentions. This post is merely to educate the audience. I do not encourage anyone to mess with other's people privacy.
Background
No one in the internet is safe, and we all must be aware of that. We hear every now and there that someone, someplace gets hack. This post, besides explaining the details and the use of the software, it might get a glimpse to you of how that happens.
First, let's get to the basic: how information is being transfered from your PC to facebook? In a nutshell, it's exactly the same as the U.S. Postal Service, you take the stuff, put it in a box, place a label on it, and the service will take it to the destination. Your PC prepare what is called a 'packet', put the chunks of data in that packet and tells the internet, hey! I have a packet for facebook, please deliver it to him, and the magic happens!
Well, Wireshark do what? By Wikipedia definition, "Wireshark is a free and open-source packet analyzer". So imagine there is a guy in the postal service that opens the box you sent, look through the things inside and put them back. This program basically do the same.
The catch? Well, first most of the data sent through the internet is in a form where only the sender and the receiver can understand and second, you need to be inside a network (like the one Starbuck has , Wi-Fi spots) to be able to work.
User Interface

At first glance, you may get scare (I did) with all the options the tool have, but we will keep it very simple here. Firs you want to do is to go Capture--> Interfaces.
MAC Users refer to to this thread if you get an error message of No Interfaces Available.
The page will display all active connections where the application can extract packets.

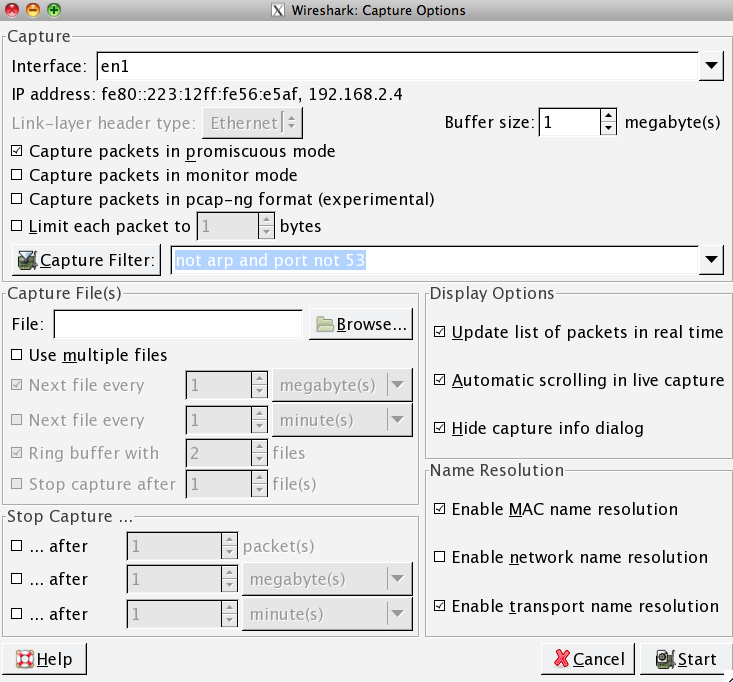
In the Options menu, I often choose the 'No ARP No DNS' filter, so I don't get those broadcast messages from the router.
Click on Start, which will get the application to start fetching data who is passing through the network. You will see something similar like the following:

Data will begin to show up in the screen with tons of information. For instance, the selected packet, says it comes from 72.246.64.82 and arrives at 192.168.2.6 (remember, all 192.168. address are one inside your network). The info of the packet says it is a JPEG file, so someone is downloading a photo, but from where? Lets see, right click on the packet and select follow TCP Stream which will display the following window;

Filters!
Filters rocks! I was getting tired of see everything, but can apply simple notation like:
ip.addr == 192.168.2.4 and tcp.port == 80
Here I am saying, hey! I want just to hear messages to this address but only for request of 80 ( web request). After input of the filter, just click on Apply and you are on.
Advance Use
Once stopped, you can save the whole data into a plain file ( a .pcap) and use your own text editor to search in it. What can you found there? From URLs, source IP, provider Broadcast messages to conversations, user name, emails and passwords (for non encrypted pages).
Someone claim that you can even see facebook passwords (check it out here!)
Do the exercise, export the file and see what you can found.
Comment below.

No comments:
Post a Comment